Tuesday, July 29, 2014

Shabby Chic Room Reveal Part 2 (Details)

Yesterday I showed you my Shabby Chic boutique.  Today you get to see all of the details!  Let's just get started, shall we?


Frame: Thrifted  Platter: already had  Straw Balls: Ikea


Vase: Thrifted Peony Flower: Walmart (I know!)


I spent a little more on these things since they were going to be on the coffee table. She already had this tray, everything on it (except the willow tree figurine) is from Hobby Lobby.


Flowers in vase are also from Walmart.


This chalkboard sign used to be a really ugly wood picture. I will do a chalkboard tutorial tomorrow.


Pillow from TJ Maxx


She wanted a display of ribbons that brides could use to show what colors they want.  So this was what I came up with.  I think it's pretty cute!  I tied the ribbons to clear shower rings.  This way they are easily removed and she can add more ribbons as she likes.


She already had this mirror, I just strung the ribbons across it.


I spent about $30-$50 on old books at the thrift store.  I just took a piece of sandpaper to them to rough them up a bit and make them look even older than they are.


I found this clock thrifting.  Since I'm really smart, I didn't take a before picture.  But it used to be dark cherry wood.  I painted it with cream toll paint and then distressed it with sandpaper. 


This used to be a picture.  I will do a tutorial for it tomorrow too.


For the gallery wall, I thrifted all of the frames (typically 75 cents to $1.50) And I spray painted them.  The cream ones I distressed with sandpaper.


For the layout, I tried to alternate cream and gold, and also the orientation of frames.


Here are some good detail shots of the chair that I didn't get before my last tutorial.


This shows how the stain looks over the white spray paint.


I just hot glued this tubing on so there weren't any staples showing.


Pictures are thrifted and all frames were thrifted.


This glass vase I spray painted and added a little twine tied around it.  Also, more flowers from Walmart.


She already had this tray and all of the candles/figurines.


This wreath was pretty easy.  I found it at the thrift store and just added some burlap  bunched and hotglued onto it.  The other two frames she already had.
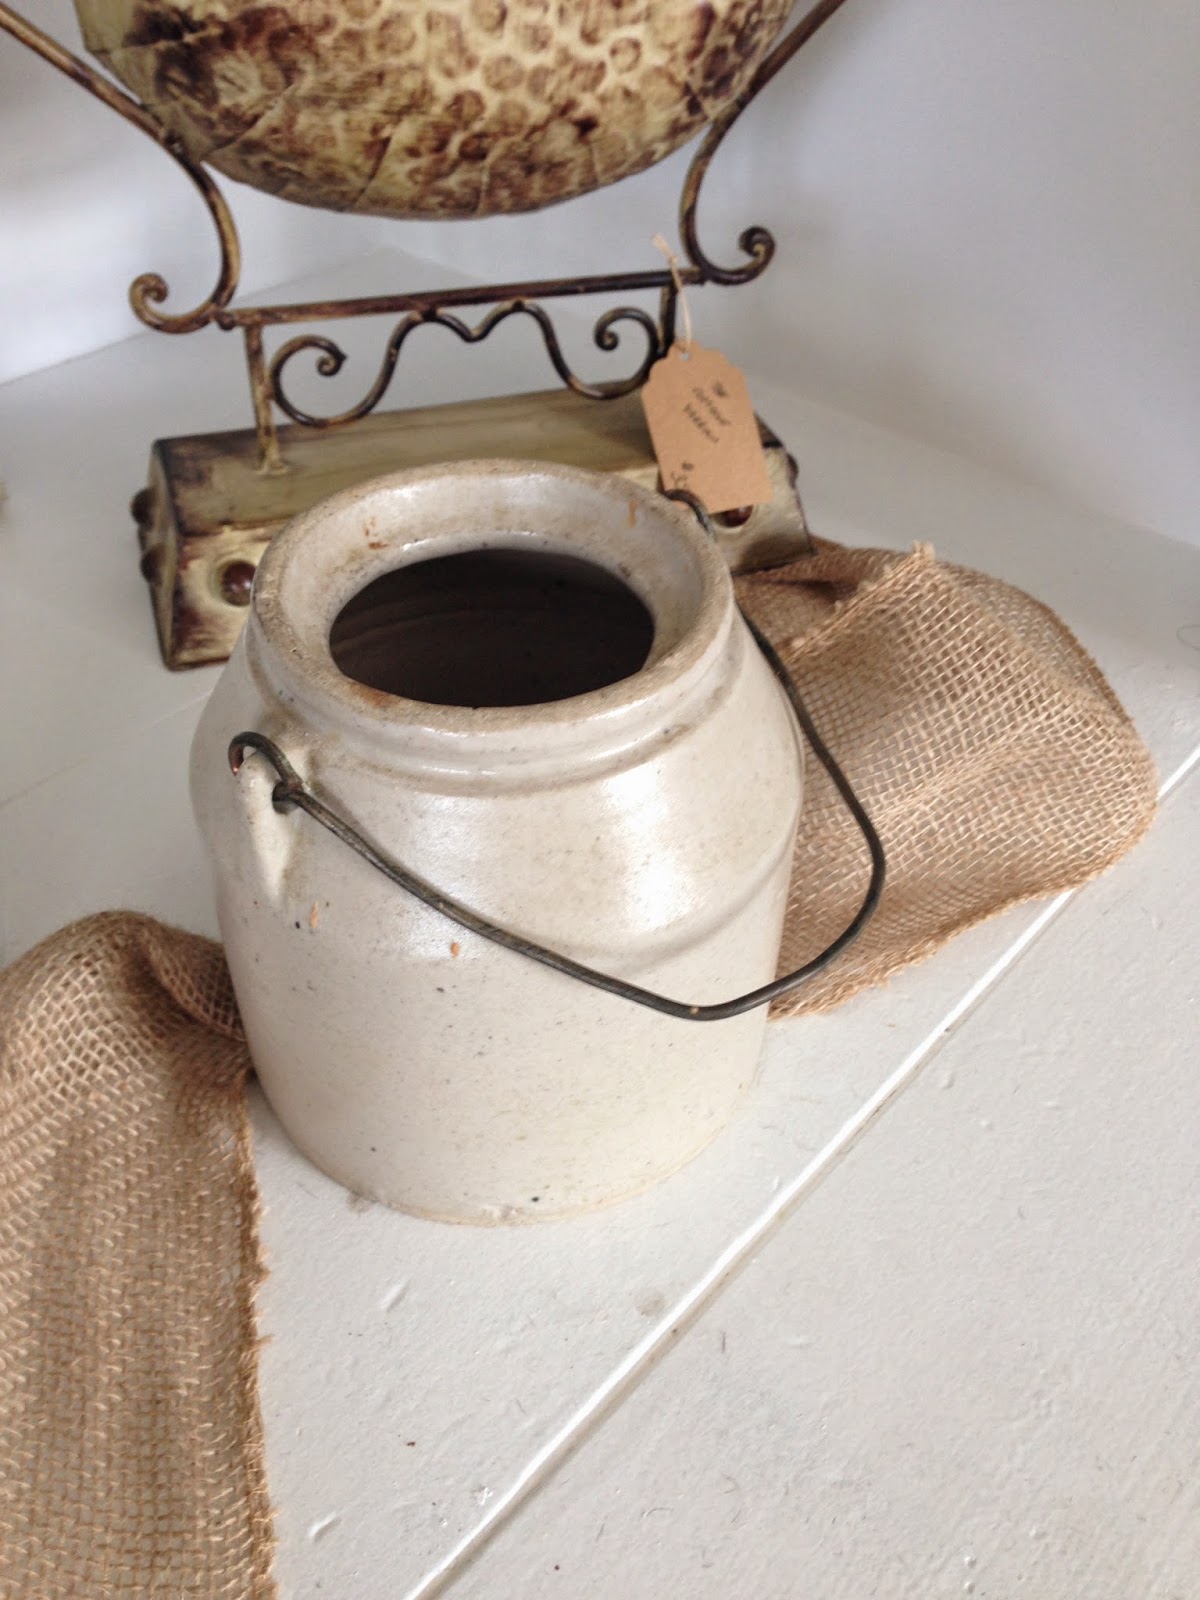

I found this old pot thrifting.  I was so in love with it and really wanted to keep it haha.


Also found this silver bowl thrifting.


The detailing on it is so cute and it would be so great for a catchall on a dresser (or a ring dish on a nightstand)


I will do a tutorial for this.  I painted this and thought it turned out pretty cute.


Plant and pot from Ikea.  I will do a quick tutorial on it tomorrow as well.


Another chalkboard. Tutorial to come.


More books.


I tried to group the books with like colors to keep it from looking busy.  When you are shopping for your books, make sure you have a few in each color and not just one random red one you can't pair with any others.


She already had this pair of antique lamps.


I used a mix of mirrors and pictures for the gallery wall.


Each picture was taken professionally of their floral arrangements. I thought it helped tie in the bridal theme along with showing how great their floral work is.


I chose pictures that had details of the flowers.


Vase and books are thrifted.  I was absolutely in love with this vase.


I bought this lamp thrifting.  It was only $15!!!! I was shocked and so excited when I found it.


Fort he shade, I found a random neutral lamp shade and just hot glued some burlap around it.


Vases thrifted.  She already had these frames.


This used to be on just a stand, I framed it in an extra frame I spray painted.


I found this metal bucket thrifting and added these flowers from (you guessed it... Walmart) 

Come back again tomorrow and I'll give you some good tutorials for chalkboards and signs!!

Monday, July 28, 2014

Shabby Chic Room Reveal Part 1

A month ago I mentioned that I was working on a project with a client.  Today I get to finally show you the room! It started out looking like this:


It wasn't bad.  But it definitely didn't flow, and it wasn't the style she was going for.  This is a boutique that  sells upcycled furniture and decorations.  She also does wedding florals and uses this room to meet with brides and do her consultations.  So she wanted this room to be sort of bridal themed, while still keeping with the rest of the boutique theme.  I used the gray hutch (pictured above) as my inspiration to base the rest of the room off of. And this is what I came up with:
(Keep in mind that I forgot my Nikon and all of these are just iPhone pics.  Also,  I couldn't find the ones I took of the most updated layout I did.... So it isn't perfect here. But I felt like I'd been holding out on posting this for too long.)


This is the hutch that I got my inspiration from.  It is gray with pink crystal knobs.  So I decided to add the deep turquoise wall color to give it a punch.


All of the furniture in the room excluding the chair I did, she already had.


Here is the closet.  Everything in here she either already had or I thrifted.  Tomorrow I will do a post with all of the decor details.


The closets were pretty challenging for me.  The shelves were pretty tall and I needed large things to fill up the space.  I used her frames, the pallet sign,  and layered it with smaller items in front.
The tree sign was made by a friend of hers.  He makes them out of pallet wood.


*Disclaimer- This was taken before it was completely done... hence it is still messy. But it gives you a good idea of the room. The reason it took me so long to blog about this is because we were waiting on a sofa which would go under the gallery wall.  But she decided to forgo the sofa and just keep it how it is (which it is laid out differently than in this photo)


This is a bench she already had.  I just added some pillows for extra comfort.

Come back tomorrow for more details about the space and to see some ideas for the projects I did.


Monday, June 23, 2014

Shabby Chic chair redo--- EASY VERSION

Bre here.
I have been working with a client the past week and a half and oh man.  Designing is exhausting.  And on top of it, I have been doing all of the grunt work (remind me to never do the grunt work again)  Like, I repainted the entire room on my own which in itself took 2 whole back-breaking, up-and-down-the-ladder, bending-over-for-what-feels-like-forever, days. I finally finished, turned around and realized I had to paint the closets. $#*@!!!!! So, 2 and a half more days later, I officially finished painting.  (I had never painted an entire room by myself before and oh man.  I would get home at night and just lay on the couch as my entire body ached.)   But in the process of this, I needed a bit more seating.  I spent every day stopping into thrift stores and scouring the clearance section of tjmaxx and one day I found this chair:


Ugly, right? Don't worry. This picture doesn't even do it justice.


It was absolutely filthy and just all around gross.


So I pulled it apart like I did with this chair last summer.


Luckily, this chair was not as stapled together as the last one so it only took a little effort to pull it apart.  Make sure to be careful to keep all of your fabric as in tact as possible so that you can use the pieces later on for patterns. (I'll explain more later on... keep reading.)
I gave this chair a good wipe down because it was really dusty and grimy.


I have a bit of a confession.  I spray painted this chair.  I have never spray painted furniture that really mattered before but the style of the room is shabby chic so I knew it would work if it wasn't perfect since I would be sanding and distressing. I used an ivory colored spray paint and it took about 2 cans to give the chair a good, solid coat.


Notice the drips? It didn't even matter later on because I sanded them all off.  Shabby chic isn't my personal style, but man is it easy to do!  
I then used a mixture of fine-grit and medium-grit sand paper to rough up all of the edges and smooth out the drips.  Make sure you really focus on the areas that would naturally get more wear and tear (the arms, top back edge, front of the legs, any areas that protrude, etc.)
Once you're all sanded and smoothed, you're ready to distress. I used a dark walnut stain for this and just wiped it on, and used a paper towel to wipe it off.  It will naturally darken and stain the ivory paint and make it perfectly distressed.
Now you are ready for the recovering.


Lay out your old chair covers on top of your new fabric.  I chose a light oatmeal linen fabric.  This is where it is important that you left your fabric in tact while removing it.  Cut around in the shape of your old fabric as close as possible (Leave more room than less room.  You can always cut fabric off!) Do this with all your pieces of chair.


My chair was tufted and the foam was still in really good shape so I decided to tuft my chair.  I cut circles out in the new fabric. I made sure to cut enough that it would wrap around the buttons.  My buttons wouldn't come apart and I was doing this for as cheap as possible so I decided to just hot glue the fabric onto the old buttons.  I figured once it was all pulled tight, it would be held on even better.


Add a flat dab of hot glue on the top of your button.


Place the fabric circle in the center of your button.  Add hot glue all around the edge and start folding in.  I should have gotten a better picture of the folding process.  But it was pretty simple. Just try to keep it as smooth and flat on the front as possible.  Don't fold in 4 big pieces or you will have a squared button.  Just push small pieces inward until it is all wrapped in (does that even make sense?)  
Next you will place the fabric on top of your foam piece. Make sure it is nice and centered and then start re-poking your buttons through the existing holes in the foam (making new holes in your new fabric)  Then your chair is ready to assemble exactly like you un-assembled it just in reverse.  Again, refer to this chair if you need a refresher or a good explanation.  I'm sorry, I'm so terrible at taking pictures during the process. I just get so into it and the next thing I know, I'm done.  This chair required no sewing, because there was no piping around the cushion.

PS, try and re-use as much as you can.  There was piping around the seat back and between the cushion and chair base and I just cut the piping out of the old fabric and hot glued new fabric to it.  I only did that because I didn't have a sewing machine and it was going to be hot glued to the chair in place so I knew it would hold just fine.  But I wouldn't recommend that because it was not only time consuming but burned my fingers lots.


And just like that, it was all done! It's really pretty and I love how it turned out! 
 \I can't wait to show you the entire room reveal, not to mention the millions of mini projects I did in between. 

Here is one more before and after:


It looks SO good in the space you guys. Just wait!

XOXO Bre

Thursday, April 24, 2014

Mexico Dreaming

I hope I'm not getting your hopes up or anything, this isn't going to be a decor-related post.  Tom and I are going back to Mexico next month for my graduation (FINALLY) and I have been looking at pictures of our January trip and just day dreaming. Wishing finals are over and that I was laying on the beach already.  And then I realized through that whirlwind of moving and this semester being absolutely insane, I didn't share any of my Mexico pictures with you! 
So, without further adieu, our Mexico trip.


View from our balcony.  We stayed at the Garza Blanca Resort in Puerto Vallarta. I would highly recommend it.  And go against your gut and stay in the mountain tower.  You are still close to the beach but with beautiful views of the jungle and ocean. :)


And don't forget these views, too. haha


A baby sea turtle that washed up on the beach. It was so cute and tiny!


So... funny story, we met Aubrey Plaza and Anna Kendrick on the beach and ended up going to dinner with them that night.  They were super nice... and kinda weird if I'm being honest.


Oh ya know, just driving down the street next to some tigers. WHAT.


Spending my mornings next to the ocean with a good book never gets old.


A little fishing village we went to called Mismaloya. So cute.


I drank my weight in pina coladas. Everyday.


Snorkling. I got stung by a jellyfish.


Holding a starfish and sea urchin.  Ocean creatures freak me out.


We went whale watching one morning and I snapped this picture. We saw about 26 whales in just a few hours, the tour guides said it was way more than normal.