
I learned something about myself these past few weeks. I cannot sit still. (I think I already knew that, but it's fun to pretend this is new news) Anyways. You might remember in one of my last posts I said I promised Tom no more projects until after Christmas. And I meant it. Then I deep cleaned my entire house, set up for Christmas, went grocery shopping, deep cleaned my entire house... and one day I was vacuuming for the 2nd time that day and I thought to myself "This is madness. I have got to do something else with my life." So I secretly bought 2 cans of paint, dropped Tom off at the airport for a work trip, and dove in to painting my cabinets. Sorry babe.
But. I will say, I did this in waves. I would paint, then clean a little, then paint some more. I was able to keep up on cleaning my house and do this project so it was a win-win for both of us. Let's just not talk about the piles of laundry laying around...
Okay. So I researched the crap out of this project. I wanted to do it once and do it right. I combined a few suggestions, learned a little on the way, and now I will share my knowledge with you. Take what you want from it.
Oh. And this is a novel. so just... yeah, sorry.
Supplies:
2 paint brushes (I really like these ones)
a pack of foam rollers (I use these)
Painters tape
Painters tape
Wood putty
Sanding block or sand paper
Optional: palm sander
Drill with drill bit
Screw driver
Plastic
Primer and Paint in your choice of brand/color

For the primer, I used Sherwin Williams wall and wood primer- but I have since heard great things about Kilz and would probably use that in the future.
And the paint is the most important part. I used Sherwin Williams Pro Classic paint in high reflective white. I wanted my cabinets bright white for a more modern look so this is what the SW pro recommended to me but any color would work for this obviously. This paint is really neat. The reason it is so great is because it wears like an oil based paint. It dries really hard and pretty fast but cleans up like latex paint- it is low odor and no mineral spirits needed. It is also pretty self leveling so it gives a nice enamel type finish. Don't use latex paint for this. Latex dries tacky and your cabinets will always feel like they stick. Use the ProClassic or an equivalent.
The process:
So I read a ton of tutorials. Most suggested sanding first to rough up your cabinets but my cabinets didn't have a glossy finish. They were pretty roughed up already. I did sand them in some areas where there was still a bit of lacquer but really for the most part, I didn't sand them.
I read that if your cabinets have a prominent grain to do more coats of primer so it doesn't show through. This is the tip I found most helpful. My cabinets are oak so they had major grain and if you've ever painted oak sans primer (hello living room mantle) you know that the grain shows through in a sort of yellowy hue... very gross. I had to do about 20 coats of latex paint on my mantle. I guess that's what I get for winging it.


Okay so for the drawer and cupboard fronts I did 3 coats of primer. I really wanted these to look like they were lacquered and didn't want the woodgrain showing through at all.
As I mentioned, I worked in sections. This was easiest for me because I didn't have to label drawers/doors or worry about mixing them up and it didn't feel as overwhelming.
This also allowed me the freedom to take a break between sections for a few days if needed, which I did.

I also found that if I primed them while they were still hanging it made it go a lot faster. Maybe that was in my head. But whatever.
At this point Tom walked in the kitchen and jokingly said "Are you going for a shabby chic look?" I was secretly so proud of him. How many husbands know what shabby chic is, let alone can use it correctly in a sentence? I'm doing my job as a wife.
I should also mention, if you're doing hardware (which I highly highly suggest) Make sure you know where it mounts. Mine previously had these little knobs.


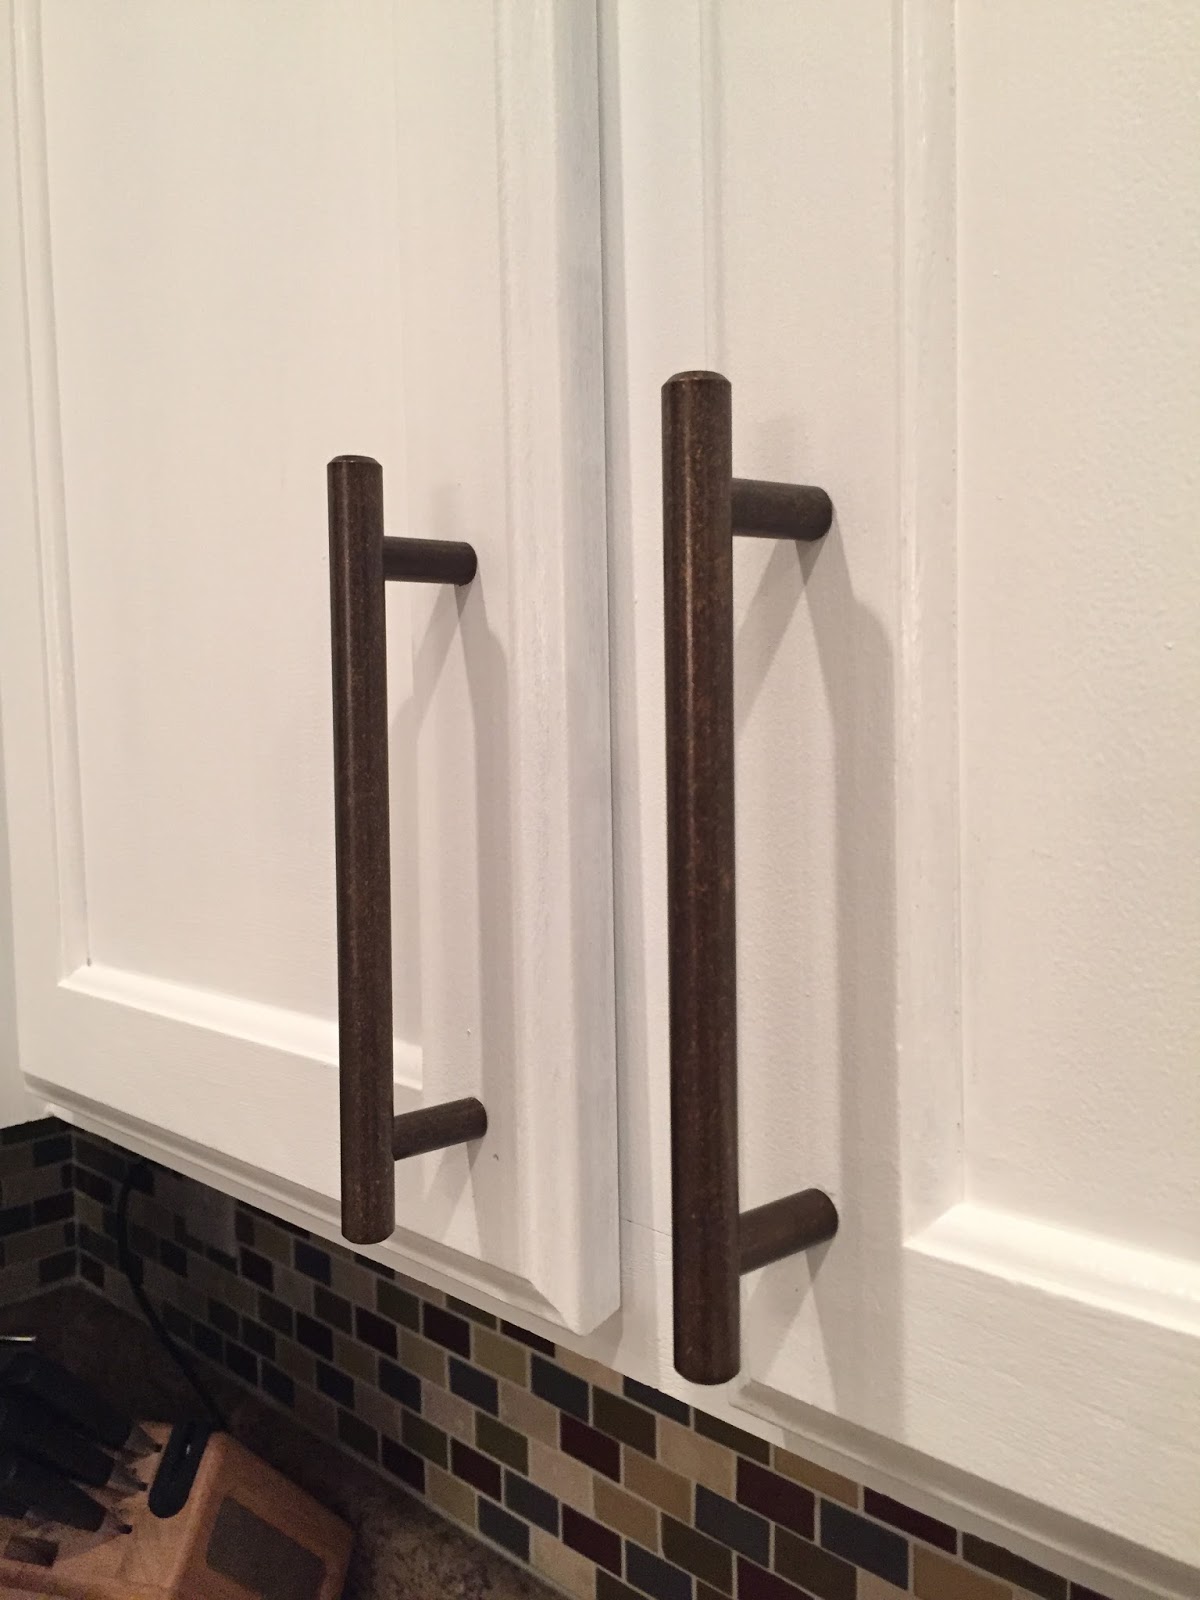
This hardware is seriously beautiful in person. It is oil rubbed bronze so its a dark metal with copper/gold flecks in it. I didn't want silver because my dining room light is brass and I also liked the idea of contrasting hardware with bright white cabinets.


The process:
So I read a ton of tutorials. Most suggested sanding first to rough up your cabinets but my cabinets didn't have a glossy finish. They were pretty roughed up already. I did sand them in some areas where there was still a bit of lacquer but really for the most part, I didn't sand them.
I read that if your cabinets have a prominent grain to do more coats of primer so it doesn't show through. This is the tip I found most helpful. My cabinets are oak so they had major grain and if you've ever painted oak sans primer (hello living room mantle) you know that the grain shows through in a sort of yellowy hue... very gross. I had to do about 20 coats of latex paint on my mantle. I guess that's what I get for winging it.

First I wiped my cabinets down really well and got all of the grime off them. I do wipe them down occasionally so it wasn't too bad but these cabinets really hid stuff and there was still some gunk on there. So gross.


Okay so for the drawer and cupboard fronts I did 3 coats of primer. I really wanted these to look like they were lacquered and didn't want the woodgrain showing through at all.
As I mentioned, I worked in sections. This was easiest for me because I didn't have to label drawers/doors or worry about mixing them up and it didn't feel as overwhelming.
This also allowed me the freedom to take a break between sections for a few days if needed, which I did.

I also found that if I primed them while they were still hanging it made it go a lot faster. Maybe that was in my head. But whatever.
At this point Tom walked in the kitchen and jokingly said "Are you going for a shabby chic look?" I was secretly so proud of him. How many husbands know what shabby chic is, let alone can use it correctly in a sentence? I'm doing my job as a wife.
I should also mention, if you're doing hardware (which I highly highly suggest) Make sure you know where it mounts. Mine previously had these little knobs.

Once I removed them, I filled in the holes in the drawers with putty because my new hardware mounted at 5", not on center. I left the holes in the doors because I just used them as one of my mounting holes.

Once the 3 layers of primer were dry on the fronts, I unscrewed them, left the screws in the cupboard so I didn't have to hunt them down later, and laid them face down on my plastic.

My island is the only place I labeled because there are so many drawers and not all of them are the same size. I didn't paint over the numbers at all because they are covered by the drawers once they are mounted. Your drawer fronts should have some screws in the inside to get them off. Make sure and leave your mounting screws inside your drawers too for safe keeping.

I laid out a bunch of garbage bags and taped them together all over my counter and table to paint my drawers and doors on. You could also buy some plastic tablecloths at the dollar store but I didn't think of that beforehand and once I'm going on a project I don't stop for anything. Except maybe a crying baby. ;) Let's just say I did stop a lot...

I used a paintbrush to get all of the creases first, then I rolled the rest with the foam roller. As I said this paint is self leveling so the brush marks went away really nicely. Make sure your rollers are high density foam or you will have tiny little hairs left all over your cabinets and that is super obnoxious. You will end up sanding them all off and starting over. Just don't do it.
It took 2 coats of the pro classic to get a solid color on the fronts. I only did one coat of primer and one coat of pro classic on the inside of my cupboards because they don't show so I didn't really care what they looked like. I started with the backs, and then flipped them and finished on the fronts. I didn't prime the creases (as you can see in the "shabby chic" pic above) because those areas won't get too much wear and tear and the pro classic filled it in nicely.

Hang your last section before starting your next section. It just makes it easier.

I would recommend laying plastic down because the paint tends to spatter and drip- but if you're like me and super lazy I have a pro tip.
For some reason clorox wipes work really well at removing paint. Even if it's a little dried. No matter what I'm painting, I keep clorox wipes and paper towels on hand. Wipe with the clorox wipes and get the rest with the paper towels. Seriously. I would miss a drip and come back a few hours later and the wipes still took it off! But my tile is super glossy so that helps.
Also, I didn't use roller trays or anything. I just dipped my brush/ rollers right into the bucket, wiped the excess off on the inside edge and rolled it on the cabinet really fast. Yep, told you I'm lazy.

Here's what all my doors look like laid out and drying so you get an idea of my garbage bag drop cloth I rigged up. Also, did I mention Roman got shots the day before I started this? He has never had any issues but of course this time, Tom was out of town, I was painting my cabinets, and he had a fever and was so miserable. I didn't get a ton of painting done that day. Oh and Stella topped off my day by puking randomly. I literally dropped to my knees and yelled "NOOOO" and burst into tears. I can do a lot of things. But dog puke is just not one of them.

Almost done! Here's a little shot before I got my hardware. Oh and I ordered my hardware from www.myknobs.com. You guys. This website is such a good good deal. Oh and if you're in the U.S. it's free shipping. Seriously I am so happy with this company. I will be ordering all of my hardware through them in the future. High quality, amazing prices, and a really great selection. Not sponsored. Just wanted to pass on the tip because good hardware is expensive!
Another thing I learned: If you have to drill new holes for your hardware, do it before you paint. It chipped my cabinets a little and I had to touch up some spots. Not a huge deal but you can avoid it so you might as well.

A little action shot. You're going to alternate between your paint brush and roller so having a paper plate handy to set them on was really helpful.

Here's some of my hardware installed

So this is how I found the best way to hang them. It's a little ghetto and I'm sure there are easier ways but like I said before, I don't stop projects to research crap and buy tools. I used a piece of painters tape cut the width my holes needed to be and placed on the side of my level.

Then I used a pen and once my bubble was level, I marked where to drill the next hole. Push your pen in a little and that will help your drill bit go in the exact right spot. To figure out what size of bit I needed, I just stuck it through the existing hole and made sure it was the same size. That ended up being a 3/16" bit for me.
For the drawers, I marked the center of my blue tape, found the center of my drawer with a tape measure, and then marked my 2 holes from there. If that makes any sense... I don't have a picture.

And here's a picture of my Romeo boy sucking on some licorice. Cuz I'm mom of the year. (Don't worry, he had like 2 licks and I took it away... and he threw a fit.) I'm blaming this on the paint fumes and dog puke...

Just wanted to show how much of a difference hardware makes in case you're on the fence...

Amazing, Right??

So here it is all "done". I installed a new faucet and felt really good about it. Except for that dang backsplash. It is just so busy and not the right colors.
I looked into ripping it out but that can take down chunks of sheetrock with it. Plus, we're getting stone one day and I don't want to have to rip out backsplash again. I looked into the peel and stick tiles because those can go over existing backsplash. But those weren't much cheaper than real tile and I'm a cheap wad. (especially if it will be getting ripped down in a few years) So I took a leap of faith and painted it. I did research special tile paint but it looked pretty intense and had really strong fumes that I was nervous having Roman breathe in. So I just used an oil based high gloss paint. I had a quart of Rustoleum paint on hand and used it with a foam roller. And holy crap. It turned out SO amazing!
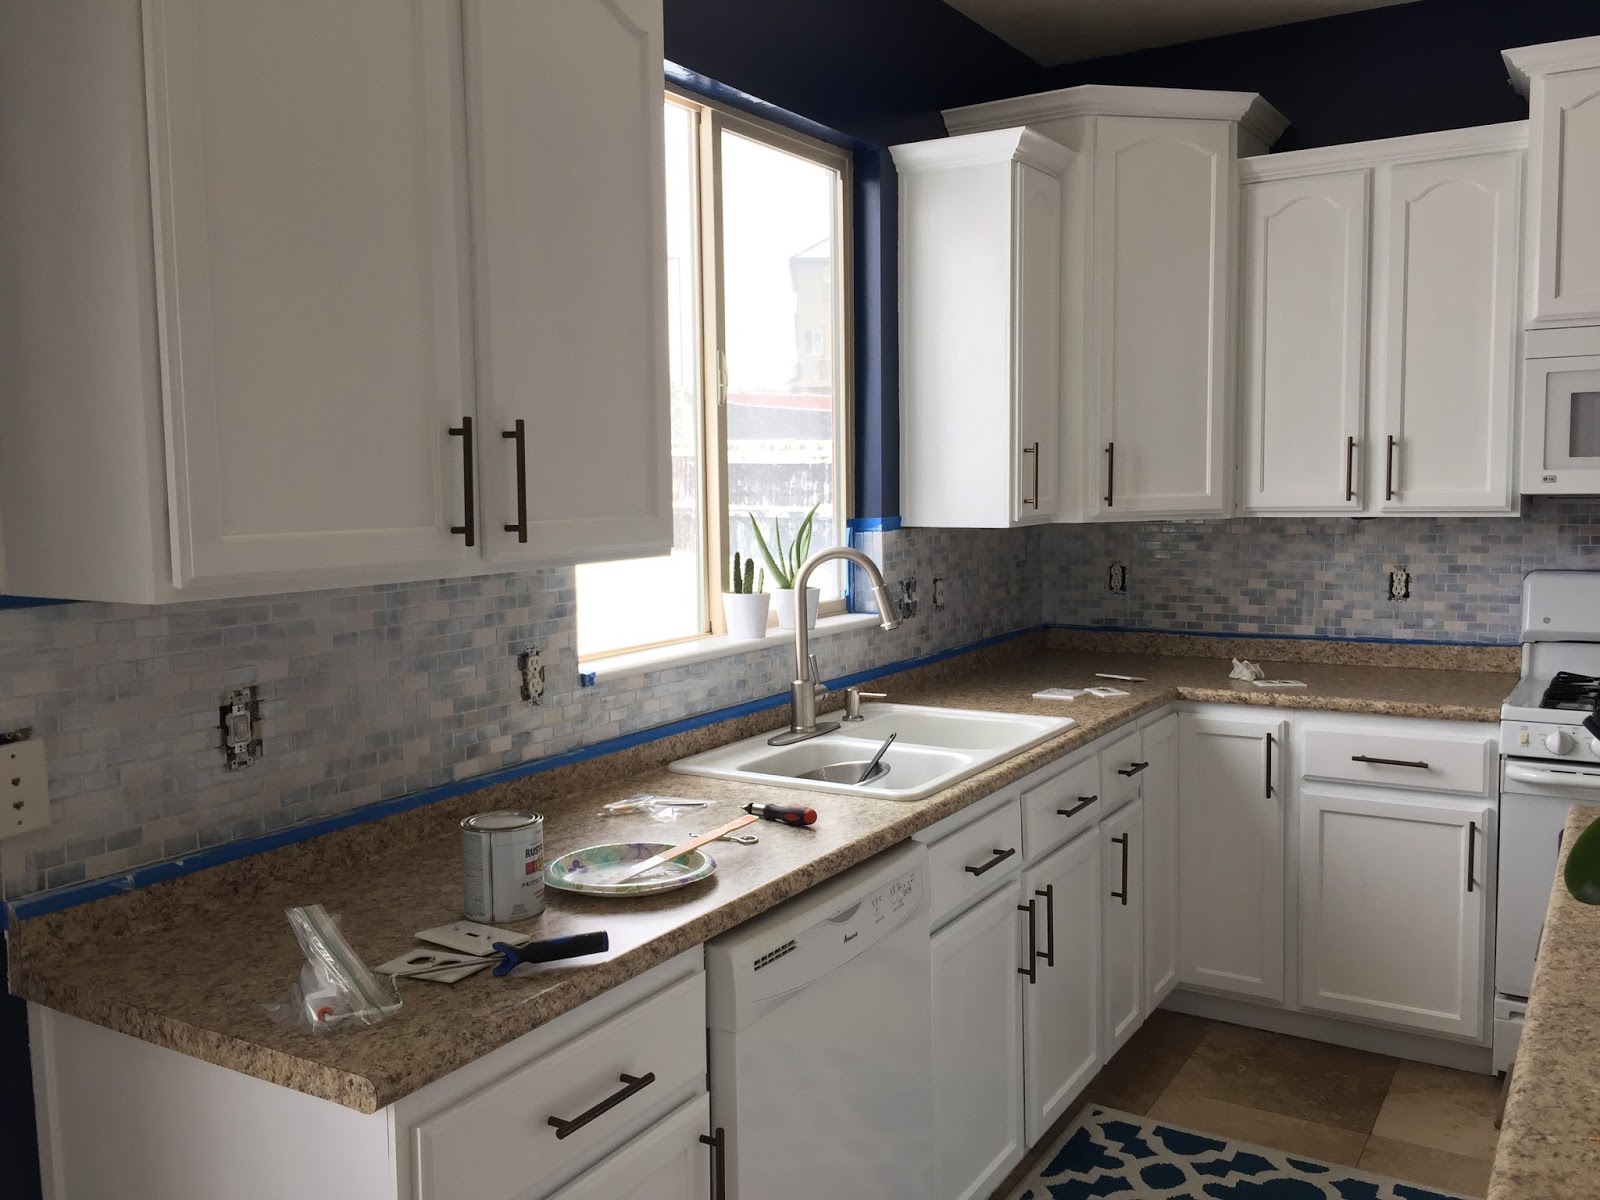
Here's the first coat. I just taped off all around the backsplash.

2nd coat

And the final product.

Can you see how glossy it is?? It catches the light and looks just like real tile! my grout was a creamy tan color so I made sure to cover the grout really well too.

Seriously I am so in love with it.

And here is a full view!

I also installed a new faucet (did I mention that?) Ours would leak occasionally and flood my cupboard underneath so it was necessary. I was really nervous for some reason but it only took about an hour including taking the old one out. Seriously I've built IKEA furniture that was more complex. haha! I even called a few plumbers and they quoted me $150 (the cheapest I found) to do it which I was about to pay, when I decided to give it a go. Lesson learned. Don't hire a plumber for this! They even give you most of the tools you need for the installation (minus a wrench and screwdriver) in the box with your new faucet.

Oh man I cannot get over this view. I find myself sitting on my couch just gazing into my kitchen lately. I promise to always keep you spotless, my beautiful little kitchen.
And just because it's so fun to switch back and forth, here's a before and after:

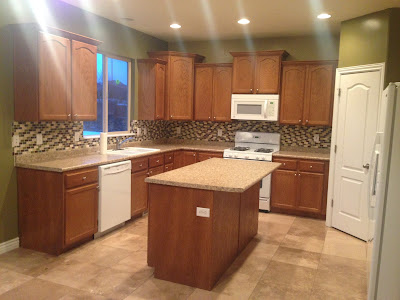
The night we walked through,

Currently.
I've had a couple questions about my kitchen and dining room paint color. It's called Midnight Dream by Behr for those wondering!
So with the gallon of paint for the walls, the gallon of paint and primer for the cabinets, the hardware, and all of the paint supplies, I spent about $250. The cabinets alone cost under $200... $75 for the paint/primer, and $108 for the hardware. Which is AMAZING. I had the paint on hand for the backsplash so I'm not counting that in the price but that would only add maybe $8.
And this took me a week. (with some days of breaks)
And I have a 6 month old that makes me stop every hour or so.
What I'm trying to say is, this is so do-able!!
If you have any questions, feel free to comment! I hope I covered everything and explained it so that it was easy to understand. If you do this, I really want to see! Please send me pictures!
And if you are still even reading this, bless you and the 3 hours I just took away from your life.
That was a lot of information. Do you feel like you just tried to drink from a fire hose?
Thanks so much for reading and following along with my crazy journey!
xoxo Bre