Wednesday, November 18, 2015

Livingroom Reveal

This was the biggest project I've ever done. Holy crap this was a beast and the fact that it's *done is such a relief.
*The asterisk is that we are going to install wood floors throughout the first floor.  But I promised Tom we'll enjoy the holidays with a clean house.  So the wood floors will wait until January.

Let's get started.
Here's the before:


The different colored wall issue that I had in my kitchen continued into my living room.  The top half was a tan with a chair rail around most of the walls and a darker tan on the bottom half.  And then some walls were just the darker brown for some reason.  Really random and really hard for me to look at.


This room went through such a process and so many tiny little changes it would be hard to document them all.


Here is a bird's eye view of what our living room looked like for a really long time.  It's a really small space and we want to eventually get another sofa or overstuffed chair for that wall on the left.  We had this big, pretty bookshelf but there was no where for it to go.  Our office has built in shelves, none of the rooms upstairs are big enough, and it wouldn't fit down our basement stairs.  So I sold it along with our Ikea rug.


Here is our living room with our new rug, blinds, and half painted.

I wanted to really lighten up this room and accentuate the high ceilings and natural light.  I also wanted to frame out the windows to give it a more finished feel.  


At first I picked the color on the bottom. (The color right above it is SW Alpaca)  It's a behr color and looked really pretty. So I had a gallon mixed up, brought it home, and started painting.  And it was purple. It doesn't look too purple in this picture. But trust me. My whole house would have been lavender and I would have cried every day.


The color I used in the end is called Alpaca by Sherwin Williams. 
It's a really perfect color.  It's gray with beige undertones so it's still warm and in some lighting looks like a warm white.  It does have lavender undertones in some light but that's a little of what I was going for. 


I decided to paint this room slowly.  I knew it was going to take a long time so I started in August.  I would spend a day painting one entire wall.  Removing everything, sanding, patching, edging, rolling, and when it was done, I would put everything back and clean all the paint supplies up.  This way we didn't have to live in a construction zone for months.  


I took a picture of my gallery wall, took it all down, left the holes, painted, and then put it back up.  Pretty simple. It only took a day.


The paint looks pink here... but it is not.


All the wood for framing the windows.


Once I had done everything I could reach, we rented scaffolding and spent the day painting, framing windows, and finishing up everything.


Look at how much wider the lower window looks than the top window.  Framing them out made them look so much bigger than they are.


The only picture I have of the 2nd story scaffolding is a snapchat Tom took. Sorry.  That was so high and scary we were just focusing on finishing.

Since there are so many windows, I wanted a sort of clean craftsman look.  Otherwise it could look too busy.


I can't even tell you the difference this makes in this room.  I painted the inside of the frames white and it opens up the windows and makes them look even bigger. (nighttime picture because it's impossible to see the details with the sun shining through them)


My mother-in-law bought us this mirror before we were married.  I have been dying to hang it over my fireplace but wanted to wait until I had painted and we could secure it into studs because it weighs probably over 200 pounds. 
Even though our house style is a little more modern/midcentury/industrial, I love the juxtaposition a classic mirror brings in.  Too much of one style is too much in my opinion.  I'm a mixer through and through.


I have already added some shelves above this little area since taking these pictures last week. I haven't gotten any good pictures yet so I'll post them later.  This is the wall the bookshelf used to sit on.  And these ghost chairs... Those are a story for another day :)


I also painted our fireplace white back in March.
It is amazing how much brighter it is in here!  


Here's the view of the couch from the other side of the room.

I couldn't be any happier with the way this room has turned out so far.  I still have a few projects to finish:  I need to order legs for the tv stand (tutorial coming for that too), install wood flooring, and I want to do something about the fireplace.  I'm not in love with slate and really want to get rid of it. I'm open to any and all ideas on that one. Anyways. Thanks for reading!

xoxo Bre


Wednesday, November 11, 2015

Dining Room Makeover

I had big plans for this room before we ever even owned the house.  In fact, my original goal was to paint it before we moved in.  But then the fact that I was still pregnant hit me in the face and I was barely able to even pack up my house in time for moving day. 

Okay so before:


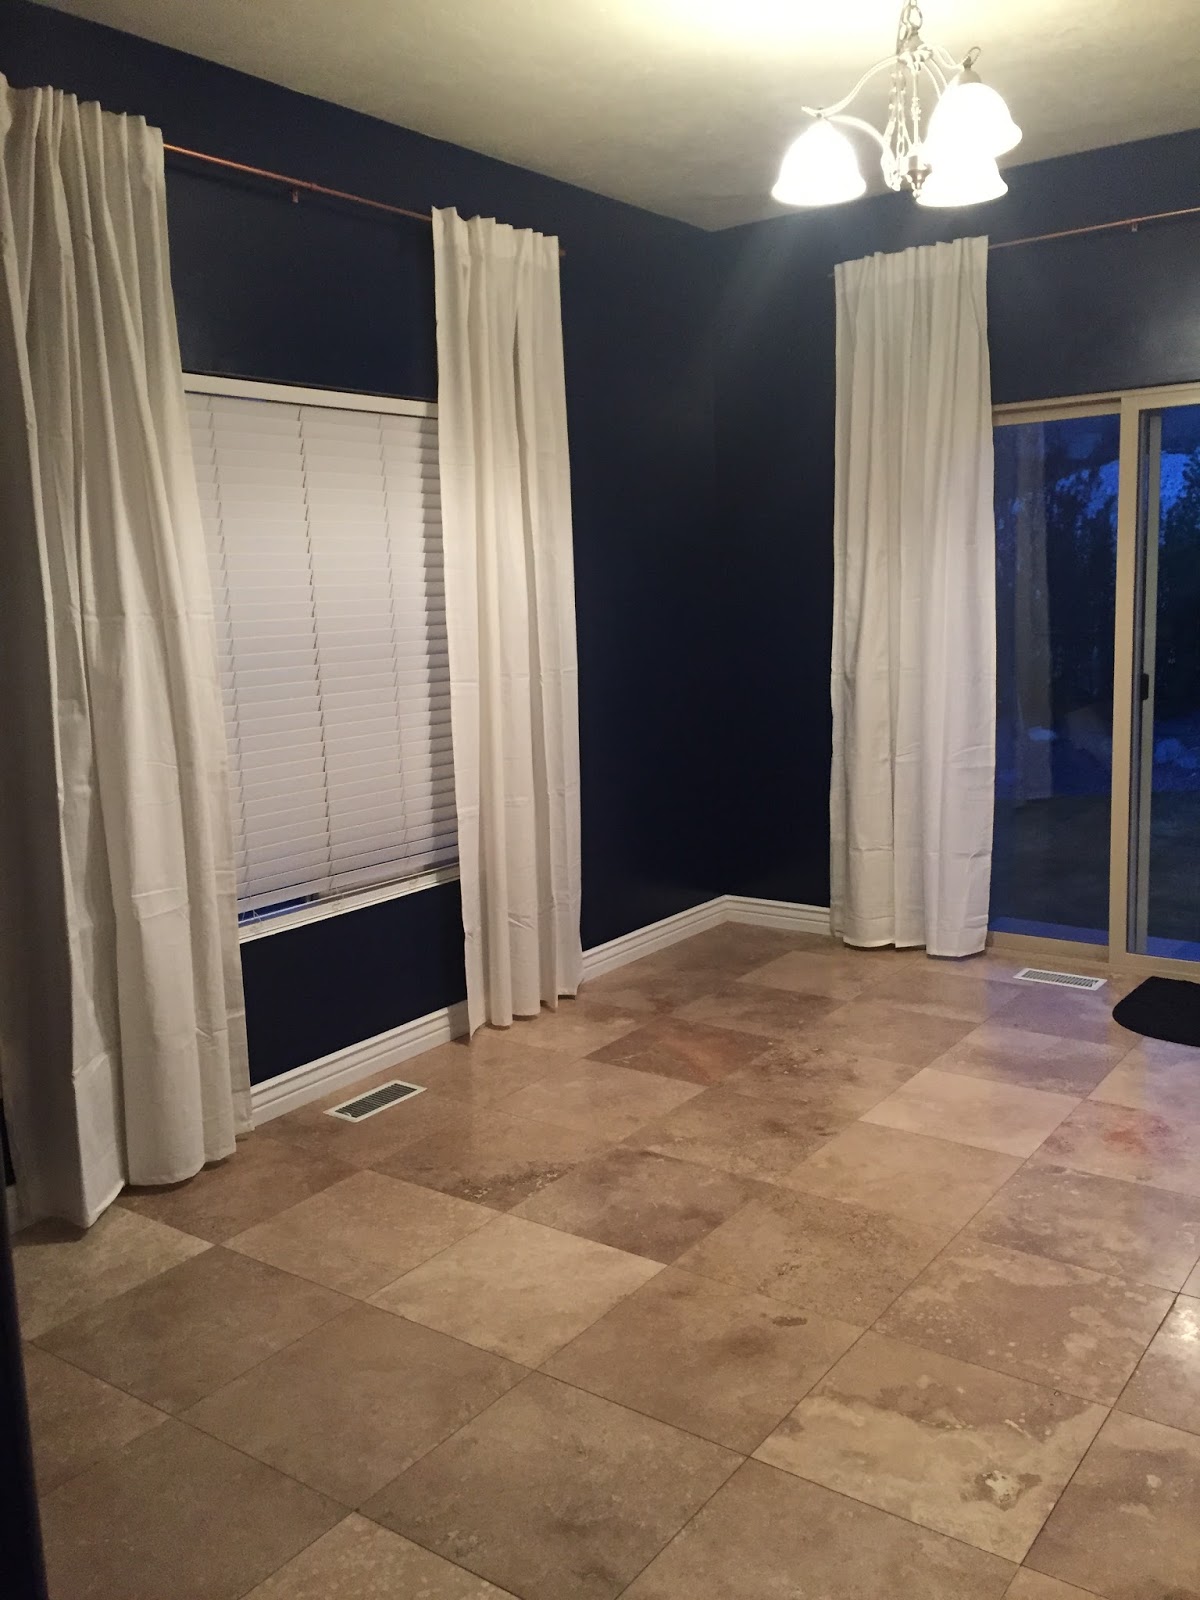
This picture actually shows it. Every wall in my kitchen and dining room was a different color. It literally alternated from light tan to poo green to dark tan to poo green. It was just too much for me to handle.


Don't mind the mess. haha. Is it just me or is that a really bad green?


Starting to look so much better already.  But looking at this picture makes my body hurt again. Next pregnancy I'm going to do a lot less physical labor. Hopefully.


Almost done...


And finished! 
(Almost... minus that little corner my big belly wouldn't let me reach)


I love this blue.  It's moody in some lighting and vibrant in others. It's perfect.


I bought these little cardboard letters at hobby lobby and spray painted them gold.


And then I hung white curtains. (FYI... Ikea is my go to for curtains.  They're extremely long, they have a good variety of colors and styles, and the price can't be beat! The quality is pretty great too.)
For the curtain rods, I wanted very simple so I just bought plain ones without finials (I think from walmart?) and then spray painted them copper.  I usually don't spend much on my rods because they're mostly covered by curtains and I spray paint them 80% of the time.

I'm going to be honest with you because this is real life. This is how my dining room sat for months.


 Proof: A tiny baby Roman in the middle of the floor. 
Mid July I got the courage to start it up again.

Rewind back to April.  I bought a table off of a yardsale site.  The guy told me it was vintage Thonet which would be sweet. Still not sure if that's even true though.  
Here it is:


I really wanted a midcentury modern style table.  This one was a yellowed color but the shape was perfect and I knew I could refinish it. Plus: BRASS FEET!!! (heart eyes)


To remove the varnish, I used Citristrip.  It comes in a spray can so no mixing necessary. Just shake, spray it on, wait a while, (I waited overnight because that's the next opportunity I had to work again) and it scrapes right off.


Seriously I used a thin plastic putty knife and the thick varnish just scraped right off. Like buttah... I don't know why but this gave me so much satisfaction to do haha. 
**Make sure you wear gloves when working with stripper or it will burn your skin.


Still splotchy so I used a palm sander with fine grit sandpaper and gave it a really good sanding.  I wiped it off with a damp cloth several times in between and let it dry to make sure I got all of the varnish off evenly.


I used Minwax Special Walnut for the stain. I love this color. So rich and the perfect tone. Not yellow, not gray, just a good natural brown. I use it for everything because depending on the type of wood, it comes out a little different. You'll see in other places in my home.


This table I rolled with a foam roller and instead of wiping excess off, I just made sure I applied it very evenly.  I think it took 2 coats to get it the color I wanted.
Tip: if you wipe your wood down with a damp cloth right before you stain, your wood will absorb the stain better and more evenly.


I ordered some chairs from Target because they were having a really good sale.  And then they finally came and literally looked like kid chairs next to my table. Wah Wah. So I lugged them back to Target and went back to hunting for the perfect chairs.  I really liked this style and had my heart set on it.  But every single chair like this I could find was disappointingly small.  And then my sister texted me a picture of my chairs but tall at Downeast!! Yessss.  I called them and had them order in 4 for me and picked them up a week later.


Then I found this light from West Elm and pretended to be an electrician and installed it myself. (thankfully I took a lighting class in design school haha) 


I really wanted a fiddle leaf fig tree for the corner but couldn't find one anywhere. If you're in Utah, Cactus and Tropicals in Draper has the most amazing selection I've found! See?


Anyways, there's our dining room and kitchen!  I will eventually paint my cabinets white, redo the backsplash so it's not so busy, and install granite or quartz countertops.  But for now it's functional and not horrible.

xoxo Bre


Monday, November 9, 2015

Main floor powder bath

This was meant to be a quick project. Tiny room, not much effort, no big deal.  HA. I forgot how I had a baby and projects are never going to be the same. This room took me weeks. I had to hammer between naps, and wear him while I painted.  It was a bit of a juggling act. Not to mention I did this to keep me busy while my husband traveled 4 times that month. As if I needed help staying busy. :)

Before:


I took the doors off the vanity before I took this. Shhhh just pretend they're still there.


Not a horrible color. But it was pretty dull and all the other walls were really marked up and a gross off-white. Not to mention the towel bar... you don't need a towel bar to hold full size towels if you're not going to be showering in here. Duh.


I started out by painting the vanity bright white.


 Then I painted the bottom 2/3 of the wall white and the top 1/3 jet black.


Then I nailed up these boards.


P.S. If you think it's a good idea to hammer while you're baby wearing, think again. Haha poor buddy.


And then I caulked them and filled in the nail holes.


And then I painted them white.


And here it is all finished!!


These are some paintings I did. I thrifted the frames and just used leftover house paint I had on hand. And because every room needs some greenery but this room doesn't have a window, I threw in a fake Ikea plant.

I still want to get some hardware for the vanity and I have a new light I need to install.  But it is such an improvement.

Have you ever done wainscoting yourself? Would you attempt it?

Next up: The Dining Room!

xoxo Bre


Friday, November 6, 2015

Entry Makeover

So this house had a lot of 2 tone... Brown, green, and tan. I think they painted it back in 2007 and hadn't touched it since. The entry had this really bad poo green wall right when you walked in. And it just needed to go.  So I painted it white and then did a little wainscoting on it. I did this when I was 37 weeks pregnant and so I didn't take very many process pictures... I need to be better about that. But at the time it was all I could do to just get this done.

Before:


You can see how the wall is green and the rest of the walls are tan.


And the green inside the little cutout... WHY


One coat of  paint


Gaps filled in


Painted.


Also re-did my table while I was at it. The top used to be a really water warped, chipped piece of chip board. You can see it in the first picture.  I bought the table at a thrift store for like $15 with the plan to replace the top. 


I bought a piece of wood at home depot and had them cut it in half for me right there at the store.  I unscrewed the old top and just screwed the new top on with the same hardware. 


Stained it with one of my favorite stain colors: Classic gray by Minwax
I wipe the stain on with a foam brush and then wipe off the excess with a paper towel.


And finished!!


I love how it turned out and how crisp and clean it feels now. Goodbye poo green!

So I learned a few things with this project.  If you are hand nailing the boards as opposed to a nailgun, there is a little metal tool you need called a nail setter.  It pushes the nails in further and then you just patch the holes.  Also, using caulk around the edges will not only seal it and make it look like part of the wall, but it holds the boards to the wall like a glue.  
I sort of just wing it with most of my projects and learn as I go.  I don't necessarily recommend this method because it can be very painful sometimes.  For example: I nailed this design up twice.  The first time I did the long boards horizontal and the short boards vertical.  It just didn't work for some reason.  So I carefully ripped it down, and re-hammered it with the long boards vertical and the short boards horizontal.  It was a ton of extra work and my arms were not happy.  But it was worth the extra work to get the end result I wanted.

Have a good weekend!

Come back next week to see the main floor powder bath!

xoxo Bre